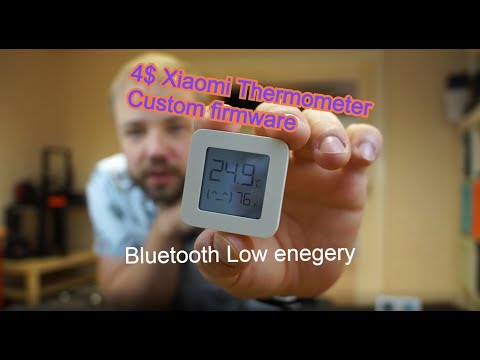
Custom firmware for the Xiaomi Thermometer LYWSD03MMC and Telink Flasher via USB to Serial converter.
This repo is made together with this explanation video:(click on it)
Victor @pvvx did some very nice refinings of this custom firmare so i really suggest on cheking it out and even use his version as it offers many more functions including non-volatile storage and a better low power management https://github.com/pvvx/ATC_MiThermometer
It is possible to update the Firmware of the Xiaomi Thermometer OTA with this WEB Tool I wrote: https://atc1441.github.io/TelinkFlasher.html
The web flasher works for many devices that uses the Telink TLSR82** MCUs and it can also be used to reflash the Stock firmware back to the device.
You can support my work via PayPal: https://paypal.me/hoverboard1 this keeps projects like this coming.
Tutorial in spanish: https://domoticaencasa.es/tutorial-custom-firmware-termohigrometro-xiaomi-lywsd03mmc Thanks to Eduardo Ruiz
- Download the ATC_Thermometer.bin file from the latest release assets and open the Web Flasher.
- Connect to the Xiaomi thermometer; searching may take a while as it broadcasts not so often for better battery life.
- After the connection is successful click on "Do Activation" to Authorize the Connection. While it's doing so you can already select the firmware file. Be careful to select the right one as it's not possible to check the firmware further.
- Click on start flashing to flash the new firmware to the Thermometer.
After the flashing is done, the device should reboot. If the screen stays off, pull the battery out for a short amount of time.
To flash the stock firmware back to the Thermometer, just open the corresponding file (link in the section "Stock firmware" at the bottom of this document) for flashing.
To flash a new firmware via an standard USB to UART adapter, simply connect the Thermometer as seen in the picture Mi_SWS_Connection.jpg to the USB to UART converter and run the ATCtelink.py tool with the first parameter being the name of the file you want to flash.
Example: "python3 ATCtelink.py ATC_Thermometer.bin"
If the flashing fails or no valid COM port can be found, you can edit it in the Python script. Also try to increase the ResetTime, I will try to make that nicer in the future! So far it turned out that flashing via MAC does not work correctly. I think it's because the data will not get pushed out in real time so the Emulated SWS protocol gets interrupted.
The UART flasher software uses code base from https://github.com/pvvx/TlsrComSwireWriter. Thanks to pvvx for the awesome work on this!
- To build the custom firmware on your own, follow this guide to get a working TC32 Compiler environment ready where you can add the Custom Mi firmware.
Original guide in Chinese: https://github.com/Ai-Thinker-Open/Telink_825X_SDK
Guide translated to English with Google Translate: https://translate.google.com/translate?sl=auto&tl=en&u=https://github.com/Ai-Thinker-Open/Telink_825X_SDK
- Try to "make" the blink example included in the SDK once to see if the compiling works as it should.
- You can then copy the folder "ATC_Thermometer" into the example folder and go into that with the terminal.
- Now do a "make" and it will build the custom firmware.
- The newly created .bin file can then simply be flashed by either the Web Flasher or the USB to UART method.
Because of the OTA dual bank update method a firmware can be maximum 256kB in size.
The MCU used in the Thermometer is the TLSR8251 the datasheet can be found here: http://wiki.telink-semi.cn/doc/ds/DS_TLSR8251-E_Datasheet%20for%20Telink%20BLE+IEEE802.15.4%20Multi-Standard%20Wireless%20SoC%20TLSR8251.pdf
On boot the custom firmware will show the last three bytes of the MAC Address in the humidity display part on the LCD for 2 seconds each, the first three bytes are always the same (A4:C1:38) so not shown. Also the BLE name will include the last three bytes of the MAC Address.
The following settings can be sent to the RxTx Characteristics 0x1F10/0x1f1f
These settings can be stored in the device by clicking the "Save current settings in flash" button or can be reset to default by clicking the "Reset settings to default" button.
The default value is denoted by the option being written in bold
Will show Battery % (when the battery symbol is displayed at the bottom of the screen) or Humidity % (when the battery symbol is NOT displayed at the bottom of the screen) alternatively every 5~6 seconds.
0xB1 = Enabled
0xB0 = Disabled
0xFF = Temperature in °F
0xCC = Temperature in °C
0xA0 = Smiley off
0xA1 = Smiley happy
0xA2 = Smiley sad
0xA3 = Comfort Indicator
0xAB = Smiley blinking
0xAE = Custom
0xAF = Mi Like
New measurement interval (How often the Temperature reading changes in the BLE Advertising data) Does not influence the battery uasge.
byte0 0xFE
byte1 0x06 - value times 10 seconds = interval 60 seconds default.
byte0 0xFA = Temp offset
byte0 0xFB = Humi offset
byte1 as an int8_t
so Temp = range -12,8 - + 12,8 °C offset Humi = range -50 - +50 % offset
When the temp or Humidity changes too fast between the main loop (5 seconds interval), the Advertising will be instant for that one.
byte0 0xFC = temp_alarm_point // value divided by 10 for temp in °C
byte0 0xFD = humi_alarm_point
byte1 as int8_t
Temp alarm from 0,1°C to 25,5°C Range <- 0,5°C Default
Humi alarm from 1% to 50% Range <- 5% Default
The custom firmware sends every minute an update of advertising data on the UUID 0x181A with the Tempereature, Humidity and Battery data.
The format of the advertising data is as follow:
-
Byte 5-10 MAC in correct order
-
Byte 11-12 Temperature in int16
-
Byte 13 Humidity in percent
-
Byte 14 Battery in percent
-
Byte 15-16 Battery in mV uint16_t
-
Byte 17 frame packet counter
Example: 0x0e, 0x16, 0x1a, 0x18, 0x00, 0x00, 0x00, 0x00, 0x00, 0x00, 0xaa, 0xaa, 0xbb, 0xcc, 0xdd, 0xdd, 0x00
The LYWSD03MMC sensors work out of the box with ESPHome. There are three ways to use them:
- With the original firmware by using the
xiaomi_lywsd03mmcsensor platform. For this, you need to obtain the bindkey. - With the custom firmware from this project, either by
- using
platform: atc_mithermometerin ESPHome when the firmware is configured to an advertising type of “custom” (the default) or - setting the firmware to “Mi Like” advertisement and using
platform: xiaomi_lywsd03mmcwith 32 arbitrary hex digits as the bindkey, e.g.eef418daf699a0c188f3bfd17e4565d9. (This works because the values in the broadcast are not encrypted when using this firmware, butbindkeyis still a required parameter.)
- using
platform: xiaomi_lywsd03mmc is available since ESPHome 1.15, platform: atc_mithermometer since 1.16.
The LYWSD03MMC sensors work out of the box with OpenMQTTGateway. You can directly upload OMG to the ESP32 from your web browser here, choose esp32dev-ble or esp32dev-ble-cont (for continuous scanning).
- With the original LYWSD03MMC firmware, OMG will connect to the sensor so as to retrieve the sensors values and publish to MQTT.
- With the custom LYWSD03MMC firmware from this project, OMG will detect automatically the sensor and publish to MQTT. In both cases the sensor will be auto discovered in Home Assistant per default (no configuration needed if you are already using the MQTT integration with auto discovery). You can also follow this tutorial(https://1technophile.blogspot.com/2021/08/get-your-ble-sensors-data-into-home.html) for the Home Assistant integration. You can also integrate to OpenHAB or other MQTT compatible controllers
This .zip file contains the stock firmware to go back: https://github.com/pvvx/ATC_MiThermometer/files/7300157/LYWSD03MMC_0130_upd_miaomiaoce.sensor_ht.t2.zip
https://github.com/AlmightyFrog/BuildEnvironmentATCMiThermometer
@danielkucera https://github.com/danielkucera/mi-standardauth/blob/master/provision.py
@romanhosek https://twitter.com/romanhosek https://github.com/hosek