The Ingenious Project - Gustav Gullholm's Super Clean Custom Scott Genius
Anyone who has ever bought or built a bike knows that it often comes down to compromises. Cost against performance. Weight against durability. Looks against function. Most people maybe push it a bit in some direction but accept that they have to compromise and find balance. But what if you really try not to compromise? What if you keep pushing?
This is the story of a trail bike build pushing those boundaries, looking to have it all. Great performance, low weight, being durable and having beautiful clean looks while being functional. Oh, there's one thing missing? Well, to no great surprise it didn't come cheap.
But like the old iconic Porsche ad after winning 9 out of 10 Le Mans races said - "Nobody's perfect.".
Background
Suspension remotes.
You probably either dislike a cluttered cockpit and extra cables enough to choose a bike without them, or you like the convenience and function they bring enough to live with the aesthetics. Maybe it comes from all my miles on XC bikes but I love being able to easily adjust my suspension at any time and have learned the habit of actually standing up and punching it up many climbs. Maybe it comes from doing a few marathon races where I would have been smoked without one exiting a slow section, having to get out of the saddle and sprint to keep up with the train of riders accelerating. Either way, I now have a hard time living with bikes intended to see a lot of pedaling that don't at least have one for the rear shock.
But on the other hand, I do understand those who can't stand the extra cables or don't really feel the need. With brakes, shifter and dropper remotes it's already pretty crowded and I love a clean cockpit as much as anyone. Probably more, as you will see.
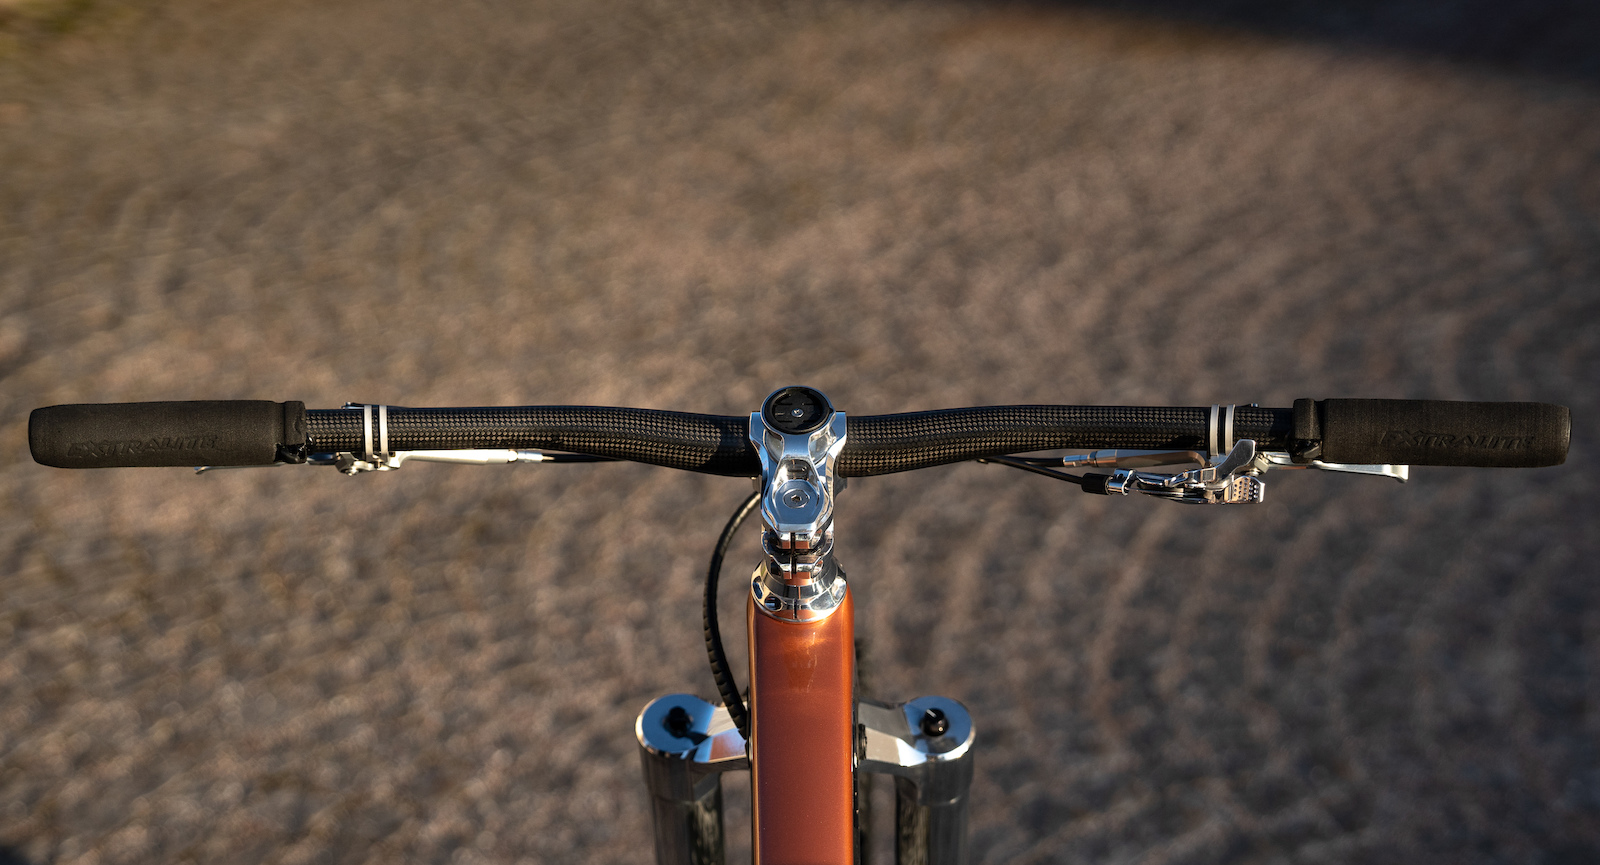
 | A plan for keeping as many functions as possible but with minimal visible cables took shape. A Scott Genius, of all models, with a cleaner cockpit than most other bikes out there. |
In the autumn of 2017, I ordered the newly released and revised Scott Genius frameset. Having spent years riding only XC bikes I couldn't wait to get back on something bigger. Being a longtime bike nerd, not to mention Pinkbike comment section reader, I already knew that few bike models are more associated with remotes than the Genius and rightly so.
Introduced back in 2003, it pioneered the 3-mode rear suspension, and in 2010 the Scott Twinloc system came along that would let you adjust your fork simultaneously as well. Perhaps there was no saving the looks of seven visible cables back when we hade front derailleurs to deal with, but I've always said that half the battle is won on any bike if you just trim your cables to the perfect length and route them nicely. These days things are made even easier with wireless solutions like the SRAM AXS system.
A plan for keeping as many functions as possible but with minimal visible cables took shape. A Scott Genius, of all models, with a cleaner cockpit than most other bikes out there. Still being the dark ages pre-AXS, a hidden Shimano Di2 shifting system was an easy choice and I came up with an idea on how to run both the rear shock and dropper post on the same cable. There were some bumps in the road, but keep on reading to see how it all came together in the end.

The Temporary Build
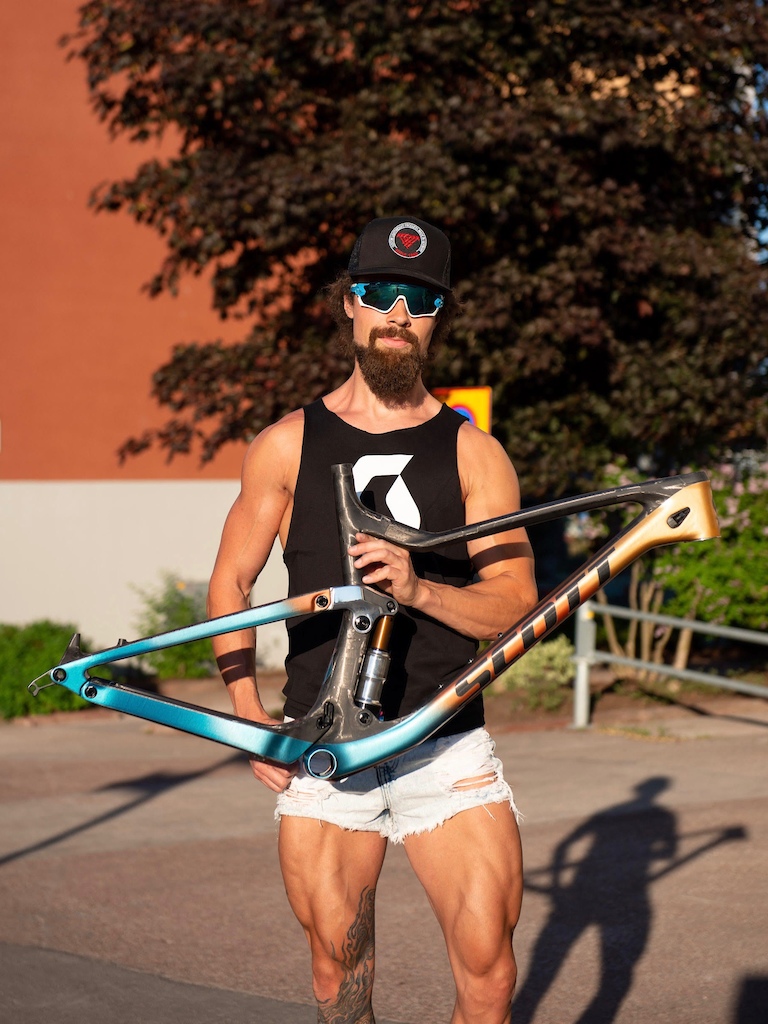
The frameset finally arrived and fresh from building my super light and paint free XC bikes, I wasn't going to keep the stock look. Being inspired by the awesome fade paint jobs a few of the bespoke steel road frame makers were doing at the time, I looked to mix that with my own Dangerholm style of raw carbon and polished metal. I brought out the knife for some more warranty-voiding work, getting quite a few funny(ish) death threats in the comment sections when the video went viral. The Internet is a tough place and apparently paint is a sensitive subject.

Many hours of scraping, sanding, polishing, painting...
...and squats later.
By the time the frame was finished and some components were stripped and polished, almost all of the parts for the bike had arrived. But there was one crucial piece of the puzzle still missing - the custom shifter/remote that would control it all.
Hiding the Shimano Di2 wire but using a stock shifter would leave me running the remote on the left-hand side like you would normally do. But this wasn't good enough since it would leave the brake hose and remote cable crossing each other and entering both sides of the frame. A much cleaner look would be to have the remote cable running along the brake hose as one, leaving one cable entry port in the frame free for a custom battery charging port. So I started looking into how you could fit everything on the right hand side of the handlebar, and it looked like the best (and coolest) solution would be to simply have my own remote made with shift buttons built in. It turns out, this wasn't so easy.
As custom as it gets, but it just wasn't meant to be.
I found someone who could make it happen and it started out great. By using a regular Scott Twinloc that was 3D scanned, we had the basics. The design was then changed a bit in order to fit the inner workings of a Shimano Di2 shifter into the same unit. A 3D print was made to check that it all would work and it looked very promising with some fine-tuning. But by then summer and the riding season had already begun so I decided to get the bike up and running with a traditional setup for everything. Building is fun but riding is the top priority.
Unfortunately, this was only the beginning of many understandable but never-ending delays. A year later I finally had a CNC machined prototype in my hand, but it still needed refinement for the ergonomics. More delays occured and by the time the middle of the 2019 season had come and gone, I gave up and decided to scrap the idea. It was a cool concept if I could have nailed the ergonomics and I still think a similar setup would have good potential, especially if paired with wireless tech. So maybe it's worth revisiting in the future.
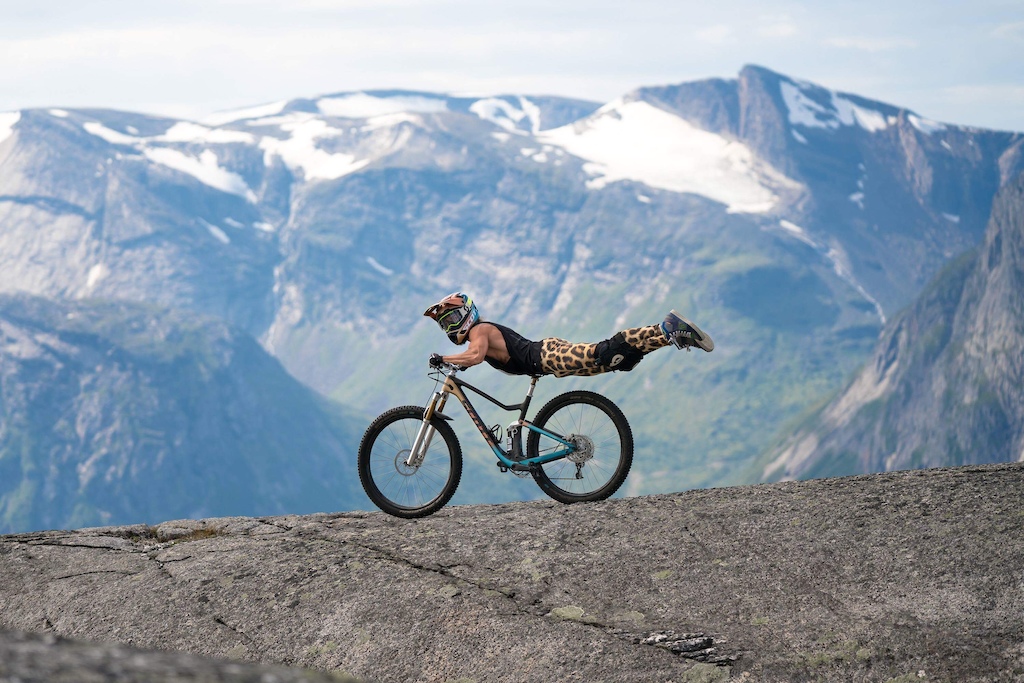
Luckily the bike rode like a bat straight out of hell either way and I am amazed by its capability I actually ended up using it mostly as a bike park and downhill bike. Good times all around.
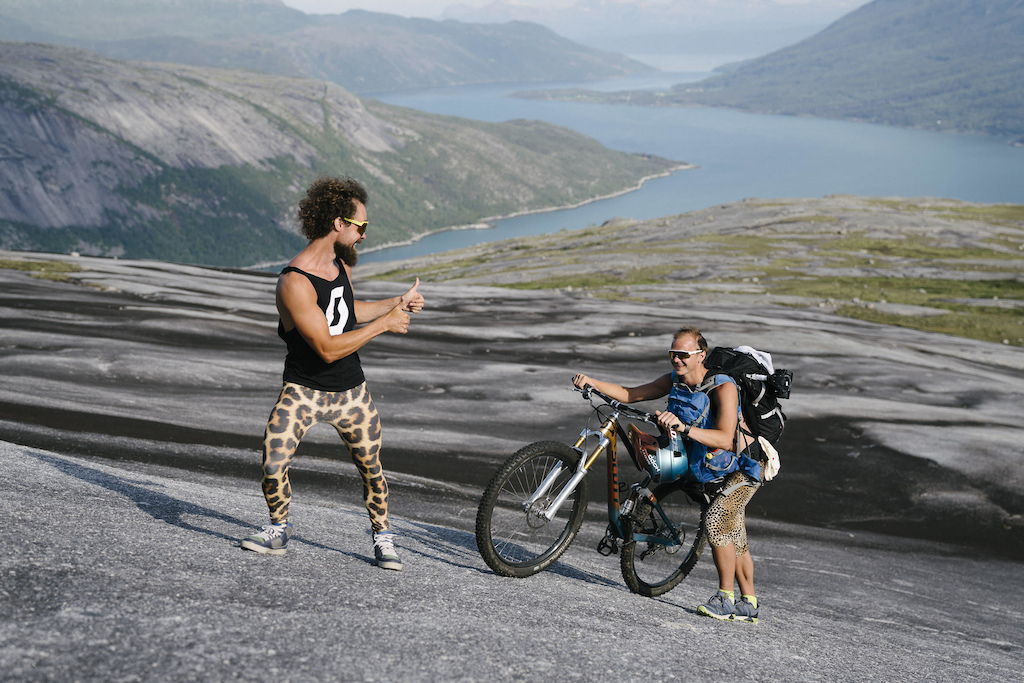
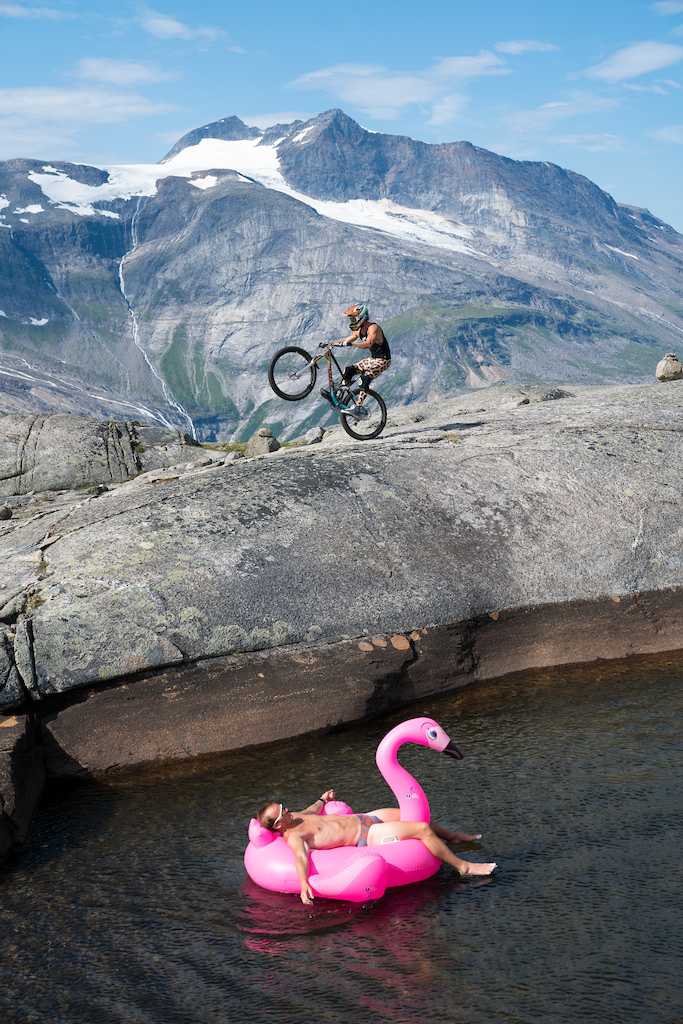
The bike wasn't finished but it still brought plenty of good times.
Taking Things To The Next Level
With the riding season of 2018 coming to an end it was time to regroup and move forward. Since I always have a hundred different ideas spinning in my head for builds and paint schemes, I'm kind of restless when it comes to bikes. The colorful metallic fade paint job had put a smile on my face many times but I quickly decided it was time for a clean new look. I was really happy about how the bike had performed in general, the initial spec had proven to be great but there was still room for some improvement.
The biggest change was replacing the fork. I upgraded the Fox 36 Factory with a GRIP2 cartridge early on and, having spent most of my time riding park laps and downhill, it had proven to be a very impressive fork. So there I was, perfectly happy with it, and then I saw the first pictures of the soon to be released Intend Hero. The performance seemed to be there and it would be a perfect match to the Intend parts I already had for the bike, and well, would you just take a look at that thing!? Those dropouts alone are small works of art and so is the use of clean black HiFi-looking adjustment dials instead of colorful ones that don't really match anything.
One detail I feel is very important for the end result is to try and match surface finishes as well as possible. So even though I managed to get a fork made for me in raw aluminium finish, it still didn't perfectly match the polished rear shock, hubs and dropper post. Nothing to do but to bring out the sand paper and polishing paste once more and get to work.
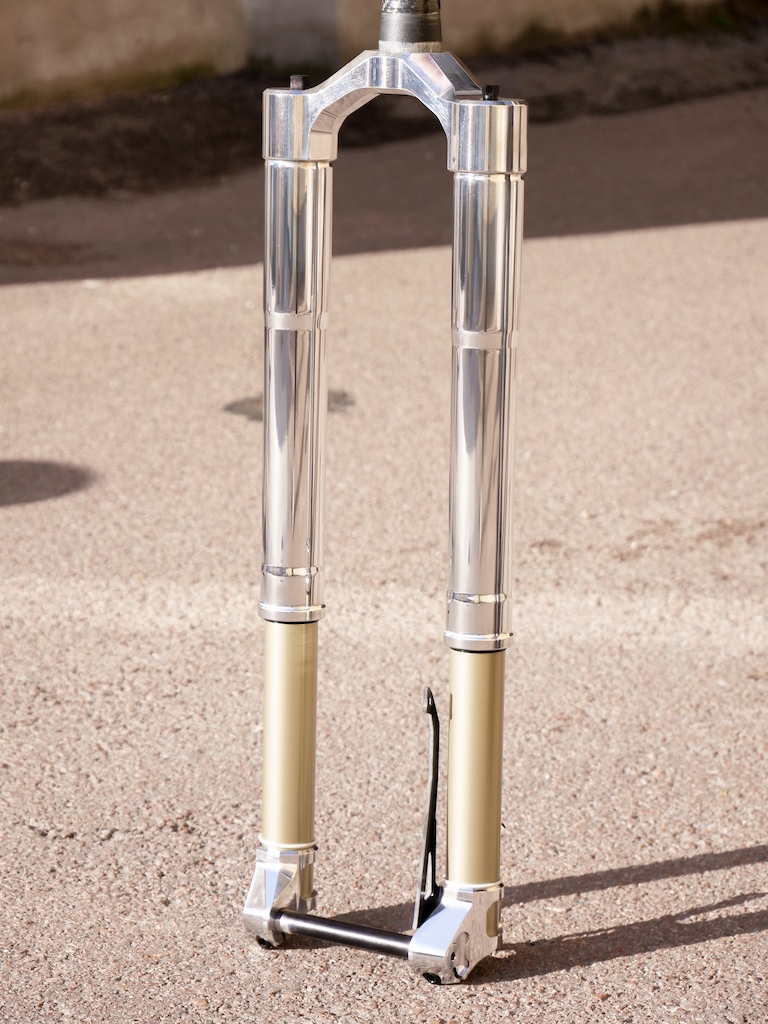
A massive hollow crown and a steel axle stiffen things up.
One of my favorite details on the entire bike.
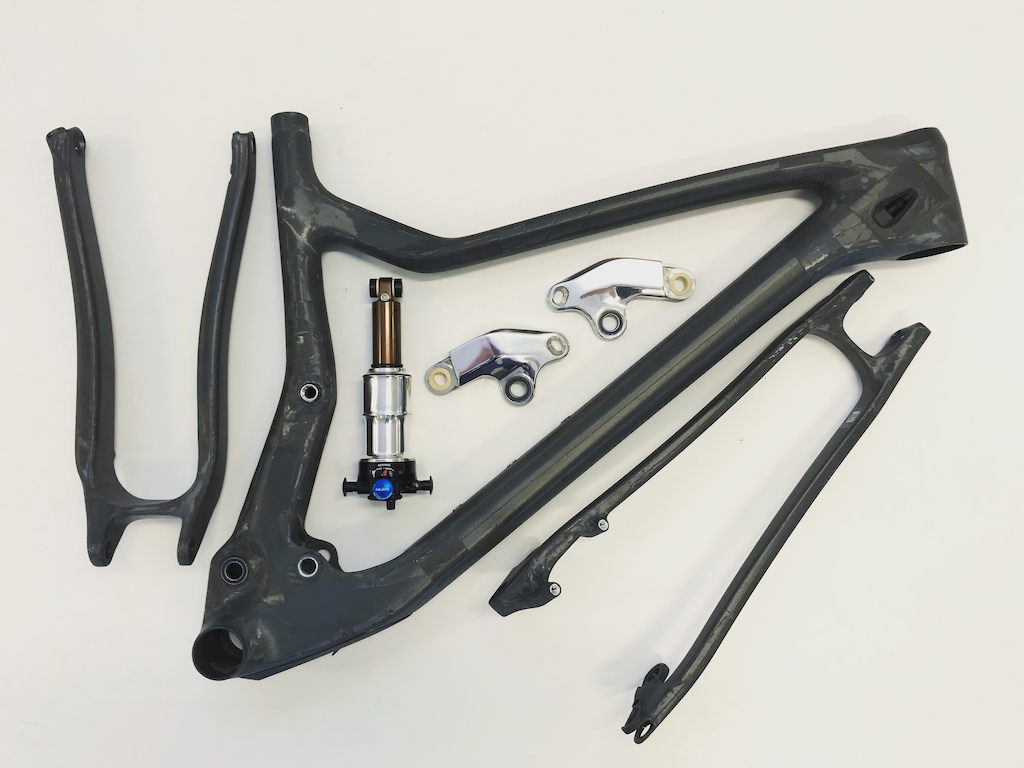
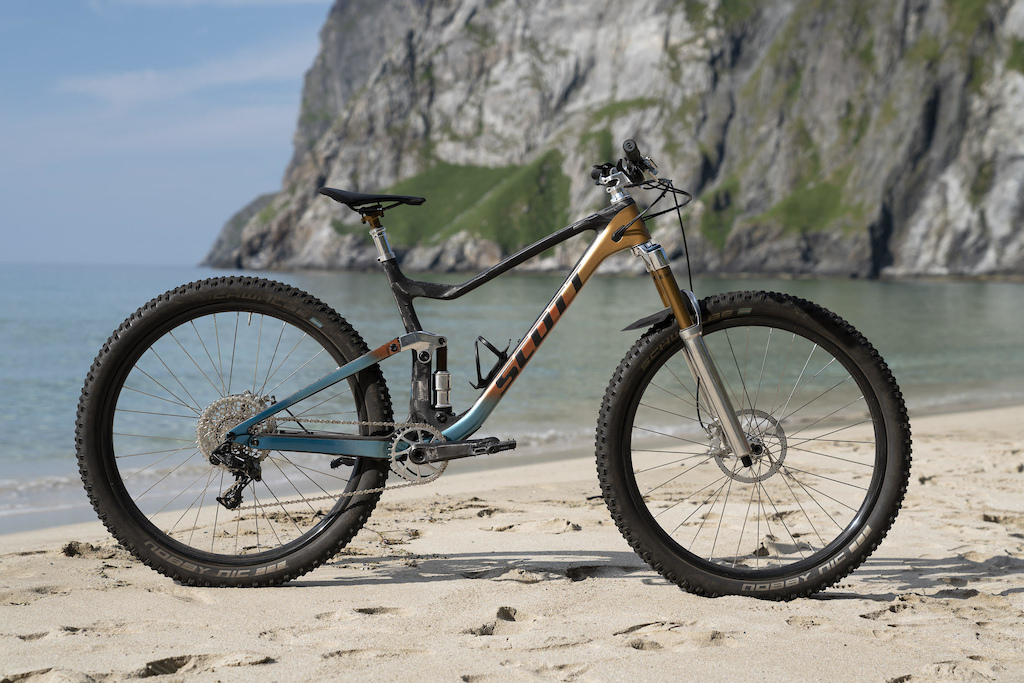
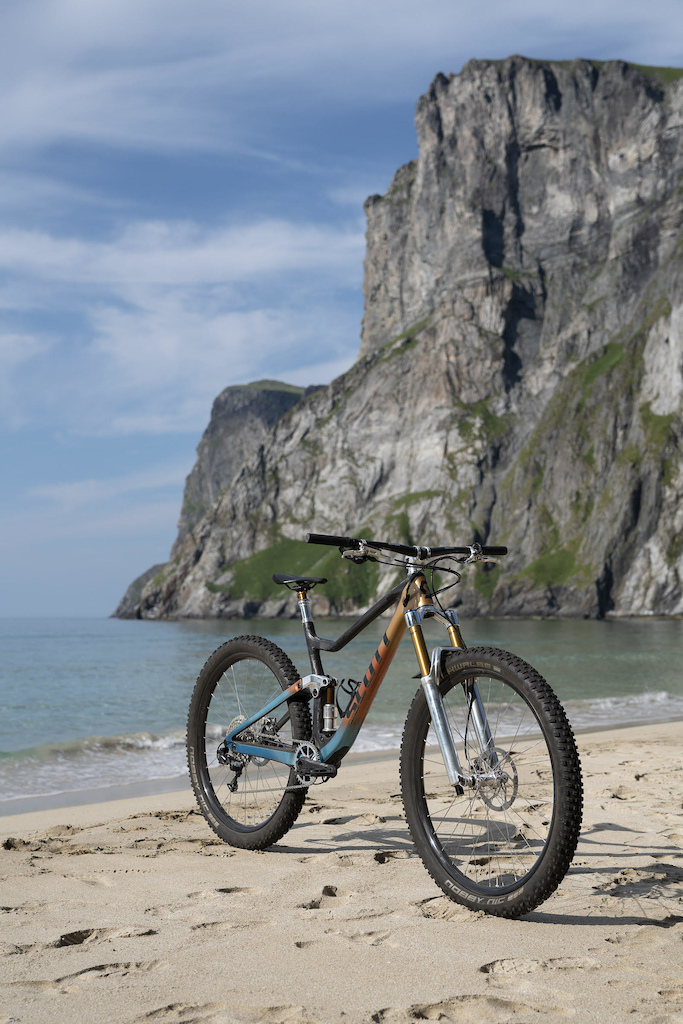
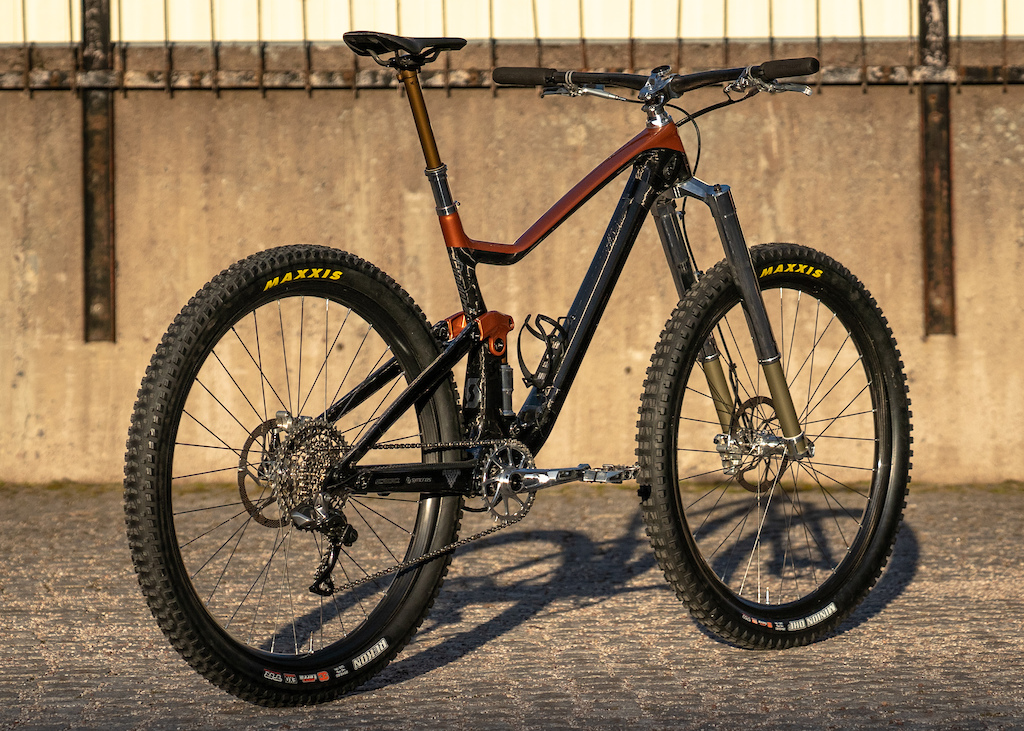
The Intend Hero fork is aimed at the trail bike crowd while their Edge fork is the direct competitor to the Fox 36. But since I had started a Scott Gambler build by then that would take over the downhill duties it felt right to bring the Genius back a little bit towards the trail side of things. Now that I had a lighter fork, I pushed a bit further in that direction by getting carbon rocker links for the frame as well. I stripped the frame back down to raw carbon and went for copper metallic against clear coated carbon and chrome decals. Believe me when I say that this thing pops in the sunshine.

The frame weighs an incredible 2140g including rear shock. 150mm travel and 65 degree head angle at XC weight.
Invisible Shifters
Having thrown the do-it-all remote project out the window it was time to come up with an alternative solution to hide the Shimano Di2 system as nicely as possible. I already had my own unique plan for the cable routing that I could still use, but for the shifter I decided to go with sprint shifter buttons hidden in the grips. Variants of the latter have already been done by other people in the past, but let's have a closer look at this unique setup that is actually quite simple but still required a lot of custom work.

The schematics of the integrated Di2 shifting system.
At the rear end of the bike sits a regular XTR Di2 derailleur, with a cable routed through the chain stay as one would expect. It then follows the brake hose nicely into the frame, where a small connection box sits. Thankfully the engineers and designers at Scott prepared the Genius for electronic shifting by making the down tube protector a battery holder. Just attach the battery with zip ties and it sits securely inside the frame, just between the bottom bracket and lower shock mount.
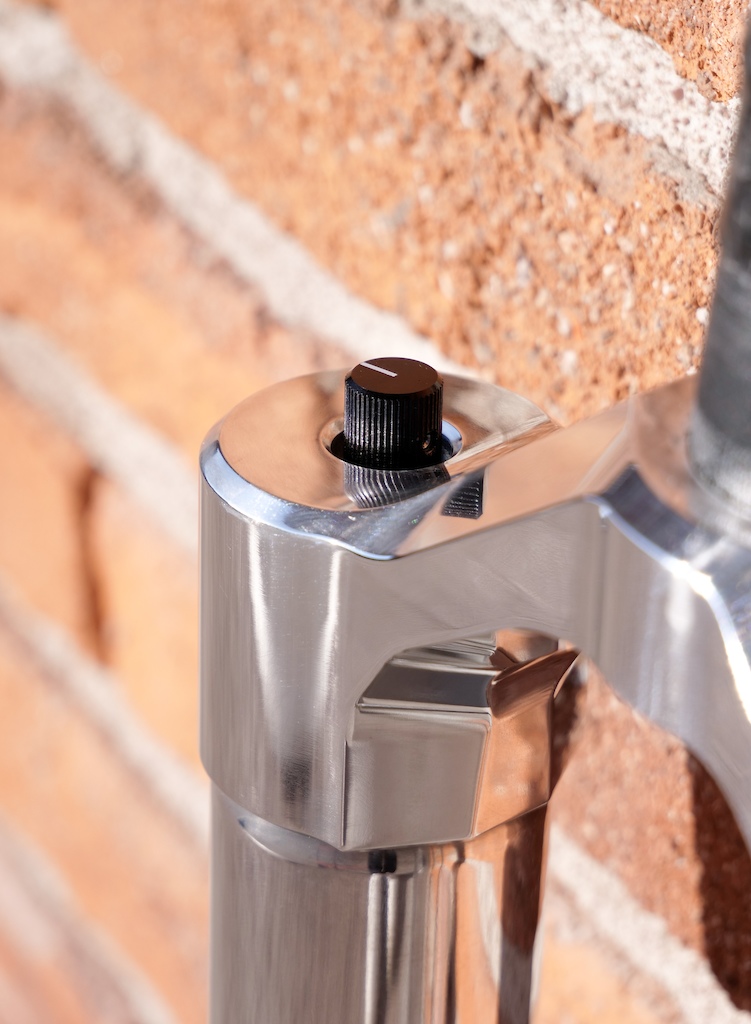
Another cable goes up to the right hand cable entry port, for which I took my Dremel skills to dentist levels. Modifying a cable port cover and a EW-RS910 junction box I managed to get the two to fit together with a click. This model is actually made for road bikes, to fit either inside the handlebar end or in special ports molded into the road frames, but this way I have super easy access to battery charging and other functions.
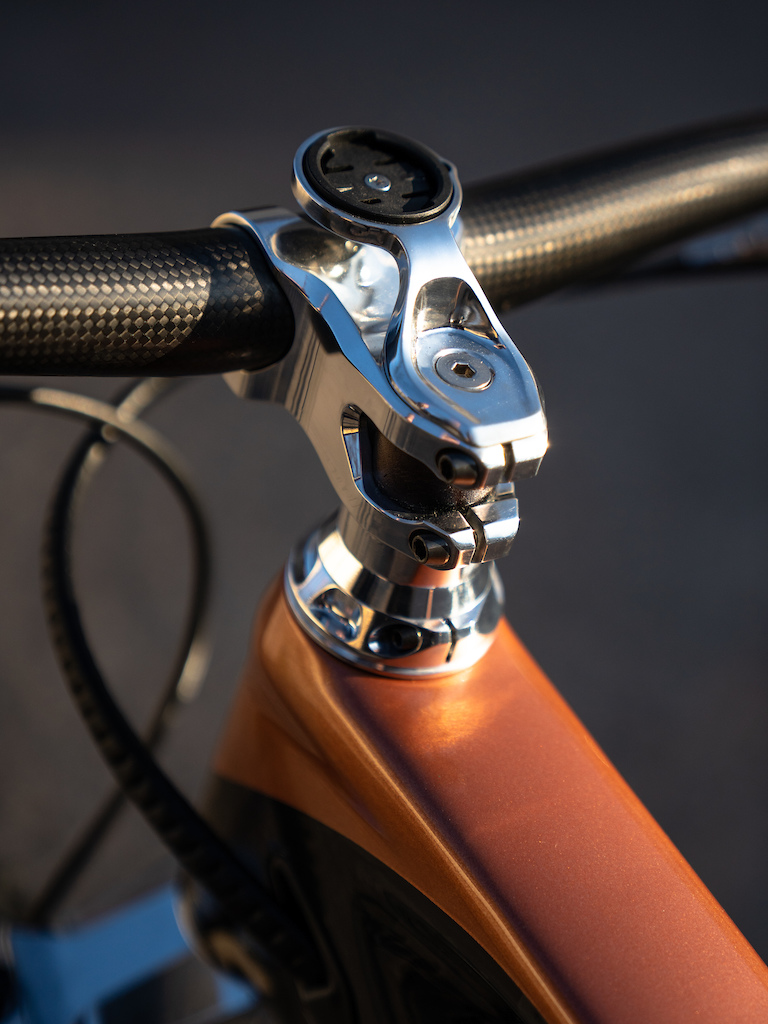
Now things get really custom. A cable obviously goes to the handlebars, but how to route it all internally? The first step was to do something I won't recommend anyone else doing - drill two holes in the fork steerer tube. As stupid as it sounds, a lot of thought was put into this. The lower hole was heavily carbon reinforced by wrapping it externally to make sure it doesn't crack. Having ridden my Fox 36 drilled and prepped in this way all of last year with all my teeth still intact, it obviously worked for me, but drilling high stress areas should never be taken lightly.
The upper hole where the cable goes into the stem sits as high as possible to put it in an area with as little stress as possible, and with the expander plug right next to it. Believe it or not but you can actually route this section without taking the fork or stem off the bike. Also, the cable is quite soft and there's enough room inside the head tube for it not to get damaged in a crash or if you want to bring those X-Ups back.
Even I draw the line at drilling a lightweight carbon handlebar. So I had Schmolke Carbon in Germany custom make me one of their Enduro Lowriser handlebars to be safe to drill.
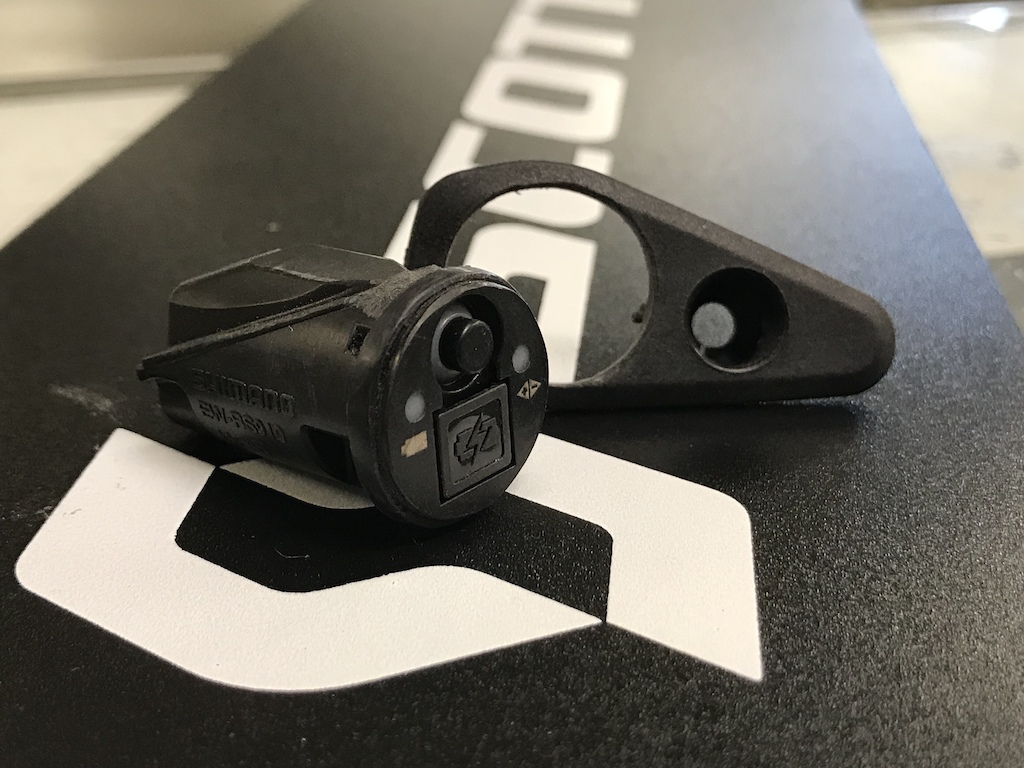
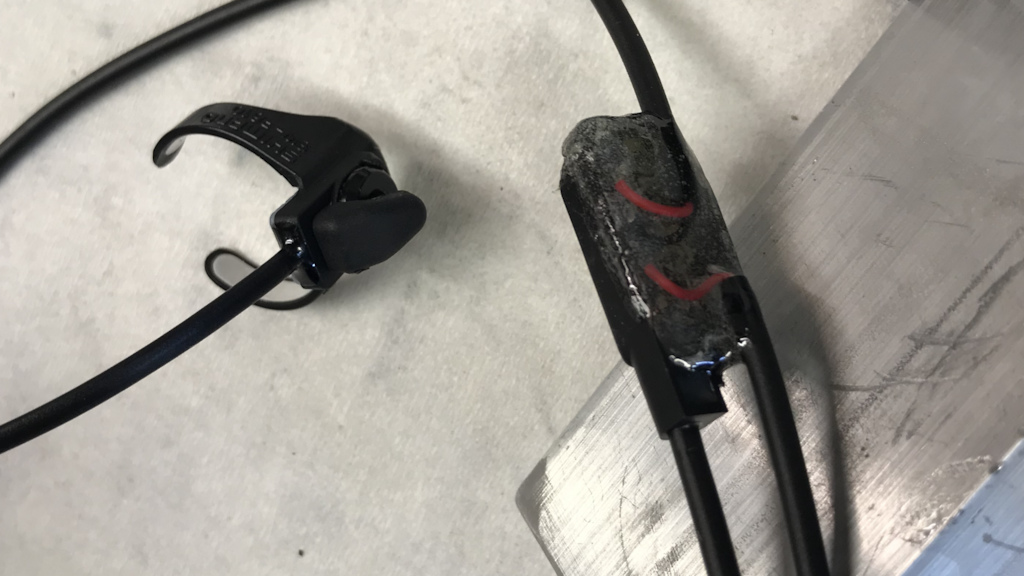
The smallest sprint shifters available are the SW-R610 but the downside is that they're not standalone units but just on/off switches really. Luckily the much bulkier SW-R600 model has got a "brain" so to say, so I took one of these apart and soldered the cables for the small sprint shifters onto the circuit board. Drenching it in epoxy made it waterproof again while still being small enough to fit inside the handlebar. A small notch in each end of the handlebar ensures that the cables wont be cut off in a crash, and they finally run under the grips to the shifters that fit in cutaways. To shift gears you just hit them lightly with the knuckle of your thumb.
A similar setup could've been achieved with a SRAM AXS system too by using their Blip Buttons, but except for bigger range and a more modern derailleur it wouldn't really have solved anything since you still would've had to route cables from the shift buttons to a Blip Box placed inside the frame.
Patient work with the Dremel for a perfect fit.
Not as Shimano intended it, but it sure does work.
The 2-in-1 Remote
Next up was to make both the rear shock and the dropper post run on just one visible cable. The heart of the system is a Fox cable splitter that was initially made in 2014 in order to run front and rear CTD suspension simultaneously. It's basically a small box where one wire runs all the way through, and a second wire is attached to be pulled at the same time. Luckily for me, it is small enough to just fit through the cable port holes on the Scott frame. The plan was to have Open and Traction mode for the rear shock while instead of having the third step lock the suspension it would actuate the dropper post.
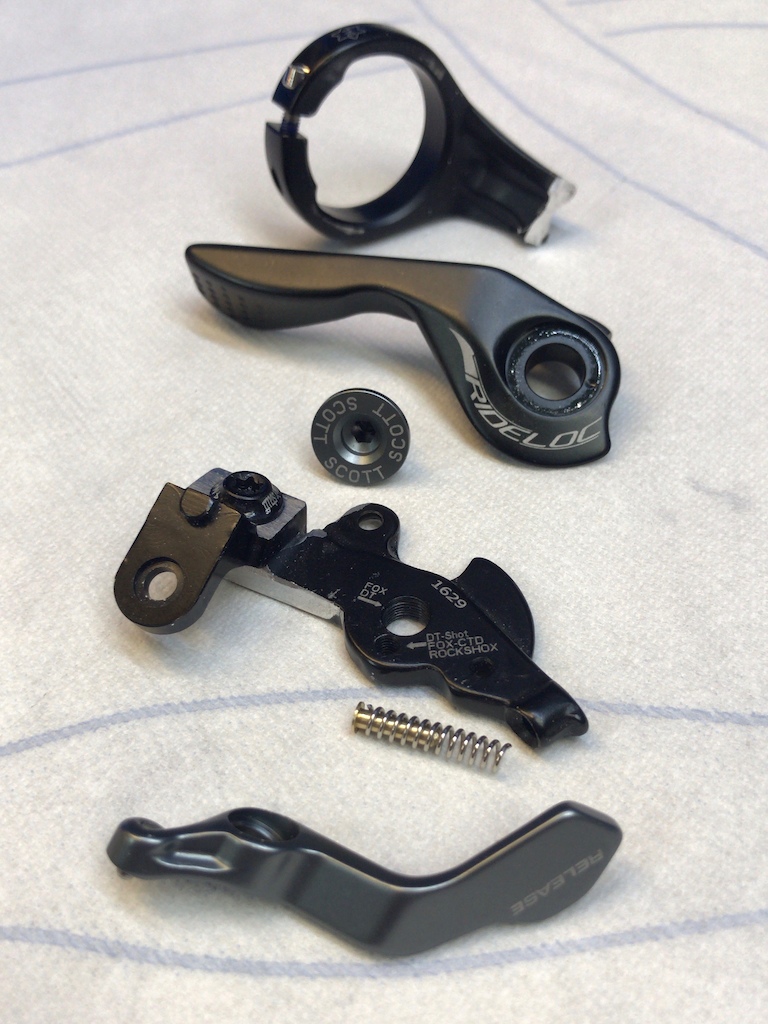
By using a left-hand side remote made to sit on top of the handlebars and flipping it upside down, it worked in the same position as a regular rear shifter sits. To make for an even cleaner setup I also modified the remote itself into a Matchmaker mount, getting rid of its own clamp. One important part was to also modify the steel plate with the small groove that makes the clicks in the remote work. By removing the stop for the third and final click, there is no chance of accidentally getting the dropper stuck in actuated mode.
More Dremel work and then some to make it nice and shiny.

The Fox cable splitter that sits inside the frame.
As I'm sure most of you can already imagine, it was no easy task installing this system the first time around. I started by doing a quick test to see that everything would actually work. The first tricky part was to measure up all the cable housing as exactly as possible. You don't have much adjustment room for this once it's all in place. To make things a bit easier I assembled the system as much as possible, which meant putting the cable splitter in place and having the housing secured to it by using tape just as a precaution for things not to come apart during the installation. Then everything was routed into the frame all the way until the remote rested against the cable entry port.
Now I could attach the rear shock onto the cable and put the remote into its second click that would be the starting point for the dropper actuation. The dropper post was then attached as well and I did a final test to see that everything was adjusted as well as possible. Now with the entire system ready I could finally pull the cables back up the frame and install everything in its right place.
1 - Rear shock open mode. 2 - Rear shock traction mode. 3 - Dropper actuation.
While it all may sound complicated the idea behind it all is actually quite simple. Say that you arrive at a pedaling section in Open mode and with your seat lowered, you press all the way and the seat will go up and the rear shock stops in Traction mode. Once the fun is about to begin you "double click", first actuating the dropper to lower your seat and then you hit the small upper remote lever to release the shock back into Open mode.
In stressful racing situations, a standard setup having everything separated would be the better choice, but the system is intuitive enough and works great for everyday riding. Worst case scenario is simply that in some situations you have to "double click" if you want to use the dropper and go right back to Open mode, but that's quickly and easily done.

Other Components and Details
Brakes: The bike gets the second most powerful brakes out there, the 4-piston Trickstuff Direttissima that are only bested by their own Maxima model. Light and smooth lever feel together with good modulation makes all that power actually usable too. Carbon reservoir covers from Hopp Carbon Parts and the discs are 180mm Intend Aero.
Cockpit: A 760mm Schmolke handlebar is paired to a 50mm Intend Grace AM stem and their special Stiffmaster headset. Its unique design is made to lower flex and mimic the feel of a dual crown fork. Keep things stiff for one-sided loads while the handlebars themselves still can flex a bit for comfort. A Syncros Garmin mount was modified to perfectly fit the stem.
Drivetrain: The original plan was to run a 11-speed 10-48T cassette from Garbaruk along with their own rear derailleur cage to handle the bigger range. Unfortunately, the bits and pieces around the derailleurs parallelogram are quite bulky on the Di2 version making it a very tight fit. Being forced to run the stock cage I sized down to their 10-46T cassette to have things running smoothly. Up front, it's matched to a 34T Garbaruk chain ring mounted on Intend Rocksteady cranks. At 557g they're not the lightest but they're bombproof and suit the bike perfectly.
Wheels: With the goal of having a do-it-all wheelset they're built on Duke Fury Jack carbon rims with a 32mm inner width and lightweight Italian Carbon-Ti X-Hub SP hubs with a 56T titanium ratchet, laced together with Sapim CX Ray spokes. Weight is just 1531g including tape and valves. For its intended trail use the bike rolls on 2.6" Maxxis EXO Rekon and Minion DHF tires.
Small parts: All the cable housing runs in Capgo foam liners to keep things silent, and a lightweight rear axle from Extralite replaces the stock one for cleaner looks. On top of the Fox Transfer dropper post sits a carbon railed Syncros Tofino saddle and a small favorite of mine is the Syncros Matchbox Coupe bottle cage with an integrated multitool.
______________________________________________________________________________________
The Result


What's Next?
It almost feels like a weight off my shoulders to finally have the Genius finished, and I couldn't be happier about how it turned out in the end. Good things take time.
But there's no rest for the wicked and I've already started the next build. This time we're going Downcountry, or BMXC as I like to call it, with a Scott Spark RC SL getting a lowered Fox 36 fork and a speced in a similar fashion. Trail or play bike worthy components on a super light yet capable chassis, this is bound to be fun to ride and wild looking.
The other Spark project with zero visible cables is still in the works and if all goes well there's actually a few more interesting projects coming in 2020.
Thank you for reading and until the next bike is finished and ready to be presented to you, feel free to keep up with the build process and more on my Dangerholm Instagram page.
Warning and disclaimer:
Please keep in mind that any modifications such as paint stripping, repainting, sanding or in any way modify frames, components or safety equipment is potentially dangerous and can lead to crashes and injuries. It will always void any and all warranties, and is strongly advised against by SCOTT Sports and all other manufacturers, which take no responsibility. If you choose to modify your bike anyway, always make sure to do so with safety in mind and remember the points above.
Author Info:
Must Read This Week
[UPDATED] Final Elite XC Results & Overall Standings from the Mairiporã XC World Cup 2024
42089 views
42089 views
Sign Up for the Pinkbike Newsletter - All the Biggest, Most Interesting Stories in your Inbox
PB Newsletter Signup
“Hold my beer.”
getting kids and then prioritizing ones own hobby or career to the point of neglecting those children, thats shitty!
keep up the awesome work and love the ones you love
(please note, I'm not in the loop with Scott products, so have no idea if this already exists.)
Your remote is definately a 10/10 hack.
To be possible to follow this (and your other builds) have been one of the main reason I hang around at our Swedish bikeforum HappyRide.se
Keep it up! Cyklist???????????????? ????????????????????????????????
If you don’t mind me asking - how did you strip the paint off the Fox 36? I’d love to make mine raw (with some clearcoat) or a kind of chrome finish.
I thought that the lowers were magnesium and therefore not to be tampered with. But you surely prove that there is a way!
Scraping and sanding? Then brushing and grinding?
Any info would be much appreciated!
As mentioned in the old article magnesium lowers are extremely sensitive and will get dull or get spots from dirt/water very quickly. My recommendation would probably be to settle for a compromise, and go for a brushed look with clear coat. It wouldn't stick well on a polished surface, but if you create a nice finish by sanding with something along the lines of P400-600 paper (maybe even 800 but the clear wont' stick as well the higher you go) and then use a 2K clear coat you should end up with a pretty cool and durable look!
Just remember that it's definitely not approved by the manufacturer and that it'll void all warranties.
Out of the box magura had solution in place for years
www.pinkbike.com/news/going-full-retro.html
Your builds are unique as fuuuuuck!!!
Can’t wait to see the rest of the projects
Bike's nice too.
Do you break a lot cranks?
Incredible work as always
f… I need those intend bits for my Nicolai.
Anyway is a very nice customization those Intend parts and fork are really nice.
Builds like this are always welcome! Not just another “custom” bike out from box with different saddle or extra sticker.