Warning: Firmware LYWSD03MMC version 2.1.1_0159 is temporarily not supported!
Please post questions about using and setting up Home Assistant integrations on the appropriate resources!
Next year (2024), a transition to modern Bluetooth SIG standards is planned. Linux has not supported Bluetooth open-standards since 2014. There is no point in waiting more than 10 years for progress in Linux. The path will sink into oblivion :).
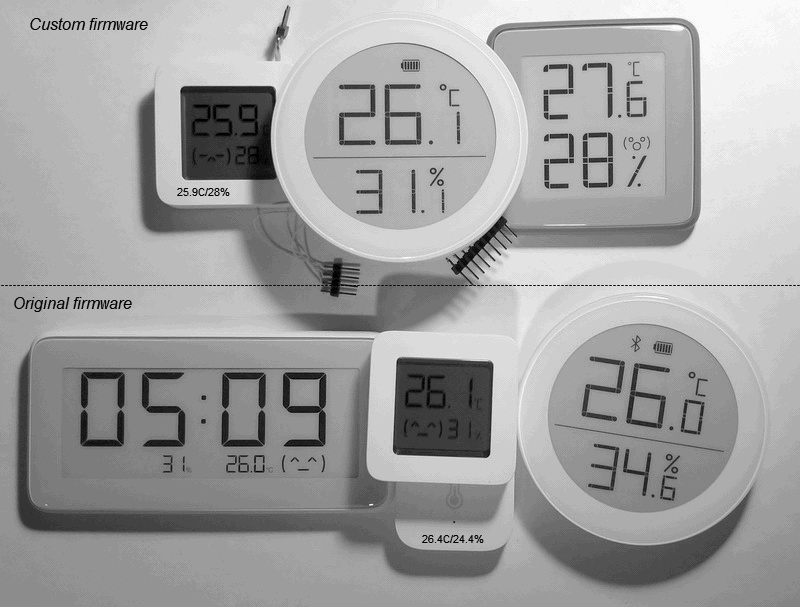
This repository contains custom firmware for several Bluetooth Thermometer & Hygrometer devices.
The download of the appropriate firmware for your device will be presented automatically in TelinkMiFlasher.html. Downloading files from this repository is not required.
Alternative firmware and configurator from ATC1441 (variant ATC_Thermometer.bin) can be found here: atc1441/ATC_MiThermometer.
Custom firmware is not supported in MiHome. But it is possible to work LYWSD03MMC with 'Xiaomi Gateway 3' by first registering in MiHome on the official firmware, flashing to custom firmware with restoring the binding key from MiHome, replacing the device name with "LYWSD03MMC" and setting the advertising type to "MIJIA (MiHome)" marked "encrypted".
Support for Zigbee firmware is in the ZigbeeTLc repository.
Support for BLE-Zigbee firmware is in the BZdevice repository.
There is an alternative firmware from Ivan Belokobylskij for LYWSD03MMC to work in Zigbee 3.0 mode.
The custom firmware can be flashed via a modern browser and over-the-air (OTA) without opening the device and unlocks several customization options. You can go back to the original firmware at any time. OTA and configuration main page - TelinkMiFlasher.html.
Key features
- Extended battery life (over a year)
- Improved measurement accuracy and extended format in 0.01 units
- Full support Home Assistant 'BTHome integration', 'Passive BLE Monitor' and other.
- Supports encrypted connections using PIN-code and encrypted bindkey beacon
- Supports Bluetooth v5.0+ LE Long Range (LE 1M/2M/Coded 500K/125K), CSA1/CSA2 (Channel Selection Algorithm), Advertising Extensions: primary and secondary Coded PHY S=8, Connectable. LE Long Range - distance of 1 km in a straight line at TX +0 dB.
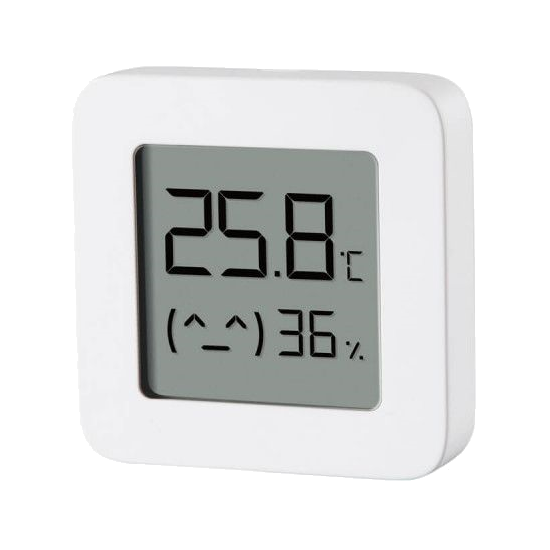
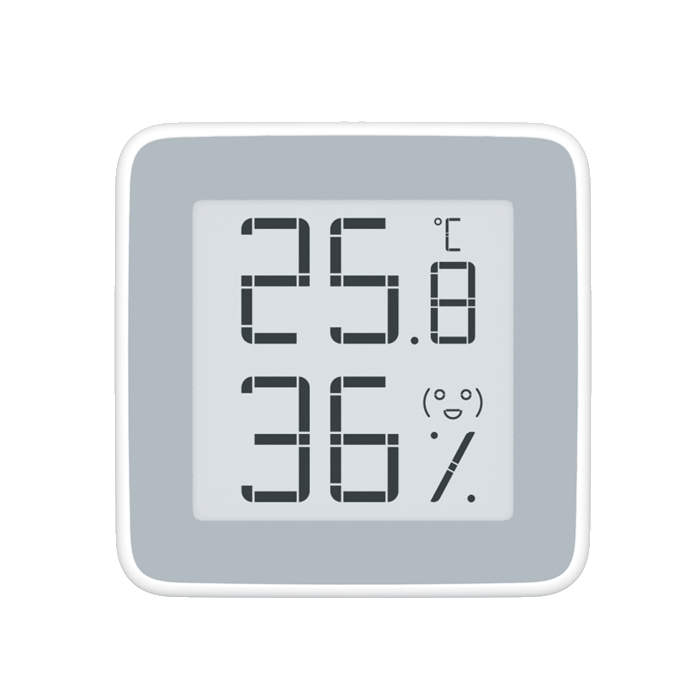
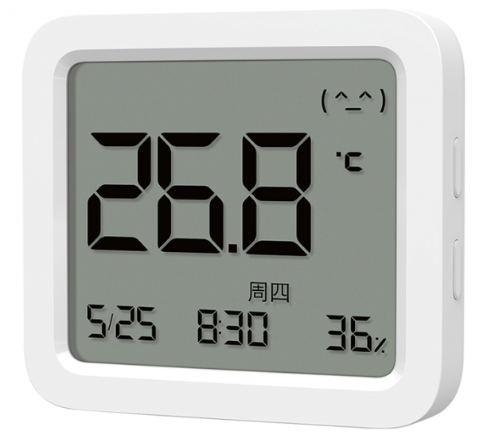
- 3 LCD Display Screens (Looping): Temperature & Humidity & Comfort, Temperature & Battery Level, Clock
- Measurement values recording & Charting. See Reading Measurements from Flash
- Adjustable correction offsets and Comfort zones
- Support for 4 beacon formats: Xiaomi, ATC, Custom, BTHome v2 and encrypted options. Legacy and Extended Advertisements.
- Adjustable RF TX Power (-20..+10dB) & Bluetooth advertising interval. +3..+10 dB require a more powerful power supply.
- DIY improvements - relay control by temperature or humidity, transmission of the reed switch status - open / closed or pulse counter
- Firmware download support for Zigbee
- Flashing third party Zigbee OTA files.
- Support Low cost BLE Advertisements Repeater into Zigbee:

Supported models:
- Thermometers with display


- Thermometers without display
| Tuya ZigBee TS0201 TZ3000 | Tuya ZigBee TH03Z |
|---|---|
 |
 |
| Programmator/Zigbee OTA, OTA | Programmator/Zigbee OTA, OTA |
| BLE and Zigbee | BLE and Zigbee |
- Tuya devices
| Tuya devices on SoC PHY62x2 |
|---|
 |
| PHY62x2BTHome |
Warnings
- Home Assistant SSD TBW. Using the Home Assistant with Bluetooth leads to rapid wear of the data carrier due to constant database recording and overwriting of small Bluez files in '/var/lib/bluetooth/'.
With a couple dozen BLE devices, a 256GB SSD is only enough for 2 years.
- If you have many BLE devices, the adapter must be able to receive BLE advertisements every 3 ms.
UART speeds of 921600 baud and even USB1.1 are not enough to transfer information in binary form in the HCI format.
Requires BT adapter with USB2.0 HS. Otherwise, there will be many gaps in the reception. Do not use ESP32xxx - it cannot work with BLE at normal speed and drains the batteries of all BLE devices when connected! ESPHome does not work with Bluetooth 5.0 and misses a lot of advertising packets from BLE devices.
- For reliable connection and refirmware on LYWSD03MMC, the battery level must be more than 40%. This is a design feature - a cheaper version of the hardware from Xiaomi.
On devices with missing power capacities, do not set 'Connect latency' to more than 1000 ms!
- Home Assistant in "Bluetooth" integration does not full support Bluetooth 5.0 and is not implied.
How to switch the USB-BT5.0+ adapter to work in LE Long Range in Home Assistant under Linux:
On thermometers with a button, if the button function is set to Connect, then a short application on the button for 80 seconds enables connection in BT4.0 mode.
If you accidentally set the 'LE Long Range' on the thermometer, and your device does not support BT5.0, remove and insert the battery - the thermometer will switch to BT4.2 support mode.
If you have a smartphone with BT5.0+ and the nRFConnect program, then you can reset all settings to default by connecting to a thermometer and sending the 0x56 command, as shown in the screenshot:

To disable only the 'Long Range' option, use the code 0xDD.
The Web Bluetooth API in Chrome does not yet allow scanning for Bluetooh 5.0+ devices.
- On Linux, when installing large advertising intervals, change the file '/etc/bluetooth/main.conf', variables:
LEScanIntervalAutoConnect=LEScanWindowAutoConnect=. Value in ms.
Table of content
You can conveniently flash, update and configure the bluetooth thermometers remotely using a bluetooth connection and a modern web browser.
To flash or update the firmware, use a Google Chrome, Microsoft Edge or Opera Browser.
- Go to the Over-the-air Webupdater Page
TelinkMiFlasher.html* - If using Android, Windows, Linux: Ensure you enabled "experimental web platform features". Therefore copy the according link (i.e.
chrome://flags/#enable-experimental-web-platform-featuresfor Chrome), open a new browser tab, paste the copied URL. Now sten the Experimental Web Platform features flag to Enabled. Then restart the browser. - For all sensors with a button, before activation, it is necessary to reset the past bindings by holding the button for a long time.
- In the Telink Flasher Page: Press
Connect: The browser should open a popup with visible Bluetooth devices. Choose the according target device (i.e.LYWSD03MMC) to pair. - After connection is established a Do Acivation button appears. Press this button to start the decryption key process.
- Now you can press the Custom Firmware ver x.x button to directly flash the custom firmware. Alternatively you can choose a specific firmware binary (i.e. the original firmware) via the file chooser
- Press Start Flashing.
-
Use TelinkOTA to flash old or alternative versions (ATC1441). This is a program for OTA projects with Telink SDK, no third-party (mijia) protections.
-
Addition for CGG1-M: Press and hold the button on the back of CGG1-M for 2 seconds until the Bluetooth icon starts blinking on the e-ink display, and then click the 'Connect' and 'Do Activation' buttons on the TelinkMiFlasherl.
-
Addition for MJWSD05MMC: Press and hold both buttons for a few seconds until the screen blink (device resets). Next, briefly press the top side button, then briefly press the bottom button. The Bluetooth icon will start flashing. Next 'Connect' and 'Do Activation' in TelinkMiFlasher.
After you have flashed the firmware, the device has changed it's bluetooth name to something like ATC_F02AED. Using the TelinkMiFlasher.html you have various configuration options.
General process:
- Press Connect
- Select the according device to connect/pair (i.e.
ATC_F02AED) - Several configuration options appear
- Choose Send Config to send changed value to the device. Or press Set default and then Send config to revert to the Defaults
| Option | Description |
|---|---|
| Temperature and Humidity offset | Enter a value to correct the offset of the Temperature or Humidity displayed: For example -1.4 will decrease the Temperature by 1.4° |
| Smiley or Comfort | Choose a static smiley or check the "Comfort" Radio box to change the smiley depending on current Temperature and Humidity. |
| Comfort Parameters | Defines the Lower (Lo) and Upper (Hi) Range for Temperature and Humidity interpreted as comfort zone. In the default configuration a smiley will appear. |
| Advertising Type | Type of supported Bluetooth Advertising Formats. |
| Set time | sends the current time to the device |
| Comfort, Show batt, Clock | Ticking the according boxes you can enable interval rotation between different LCD screens. See the example video below. |
- For SHTC3 in "lowPower" the accuracy is reduced.
- For SHT4x in "lowPower" you get a delay for the polling period, but the accuracy remains.
Example of LCD display modes
You can configure different LCD Display modes using Comfort, Show batt and Clock configuration checkboxes. The enabled LCD Display Modes will appear one-by-one in a loop.
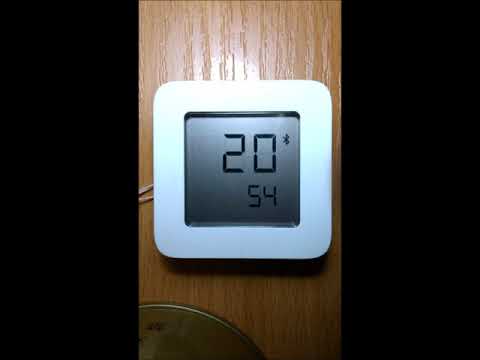
Battery and clock display are enabled in the settings. The rest of the settings is kept default. The video contains 2 cycles.
- Temperature and humidity
- Temperature and % of battery
- Temperature and humidity
- Hours and minutes
You can directly update/flash the firmware without downloading the binaries below.
Custom Firmware Versions:
The download of the appropriate firmware for your device will be presented automatically in TelinkMiFlasher.html. Downloading files from this repository is not required.
Original Manufacturer Firmware Version
In case you want to go back to the original firmware, you can download them here:
- Xiaomi LYWSD03MMC Original Firmware v1.0.0_0109 (HW: B1.4 only)
- Xiaomi LYWSD03MMC Original Firmware v1.0.0_0130 (HW: B1.4..B2.0)
- Xiaomi MJWSD05MMC Original Firmware v2.0.0_0026 (HW: V2.3)
- MiaoMiaoCe Technology (Beijing) Co., Ltd. MHO-C122 Original Firmware (Tuya)
- Xiaomi MHO-C401 Original Firmware v1.0.0_0010
- Xiaomi and Azarton MHO_C401 Original Firmware v1.0.0_0016
- Xiaomi SJWS01LM Original Firmware v1.1.1_0018
- Qingping CGG1-M 2020-2021 Original Firmware v1.0.1_0093
- Qingping CGG1-M 2022 Original Firmware v2.2.1
- Qingping CGPR1 Original Firmware v1.1.1_0228
- Qingping CGDK2 Original Firmware v1.1.1_0210
- Qingping CGDK2 Original Firmware v1.1.1_0217
- Qingping CGDK2 Original Firmware v1.1.1_0223
| Version | Changes |
|---|---|
| 1.2 | Bind, Set Pin-code, Support MHO-C401 |
| 1.3 | Get/Set comfort parameters |
| 1.4 | Get/Set device name, Get/Set MAC |
| 1.5 | Add Standard Device Information Characteristics |
| 1.6 | Fix alternation of Advertising in mi mode |
| 1.7 | Authorization and encryption in permissions to access GAP ATT attributes, if pin code is enabled |
| 1.8 | Time display (instead of a blinking smile) |
| 1.9 | Recording measurements to flash memory (cyclic buffer for 20000 measurements) |
| 2.0 | Recording measurements with averaging to flash memory |
| 2.1 | Periodic display refresh for MHO-C401 'Erase mi-keys' option to return to original firmware |
| 2.2 | Added parameter "Encrypted Mi Beacon" |
| 2.3 | Added "Delete all records" |
| 2.4 | Added parameter "Clock time step" |
| 2.5 | Remove TRG/FLG errors, minor optimization |
| 2.6 | Expanding the ranges of threshold parameters (TRG) |
| 2.7 | Reducing power consumption of MHO-C401 (EDP update), adding version for CGG1-M 2020-2021 |
| 2.8 | Added saving bindkey to EEP if mi-keys are erased, reduced TX power to 0 dB for defaults |
| 2.9 | Added additional id flags to advertising packages |
| 3.0 | Added toggle support for advertising package structures for third-party software |
| 3.1 | Fix security attributes (for pincode) |
| 3.2 | Added new encrypted beacon formats, reed switch maintenance |
| 3.3 | Added autodetection for LYWSD03MMC hardware versions B1.6 and B1.9. For CGG1-M and MHO-C401 - autodetection of SHTV3 or SHT4x sensors |
| 3.4 | Correct Hardware Version Setting for LYWSD03MMC B1.7 |
| 3.5 | Correction of moisture readings for SHT4x sensors. Rounding off sensor values on display.. Saving HW string B2.0 on LYWSD03MMC. Eliminated battery voltage noise in CGG1-M. CGG1 - correction of the battery charge display. Added CGDK2 and modified (DIY) variant of CGDK2-2. |
| 3.6 | Additional parameters: Support BT5.0 PHY, Channel Selection Algorithm 2, Correct RF-TX Power in suspend |
| 3.7 | Added format 'HA BLE', reed switch operation mode: Switch and Count. Full support for "HA BLE" encryption. Speed correction I2C for LCD controller LYWSD03MMC HW:1.9. Support for CGG1-M hardware version 2022. |
| 3.8 | Fix clear_memo, renaming 'HA BLE' format to 'BTHome' |
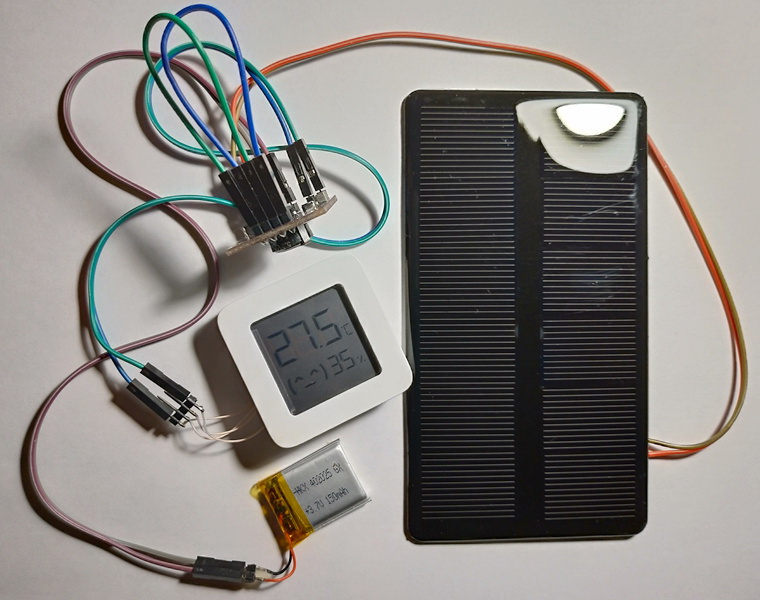
| 3.9 | Changed the calculation of battery readings in %, optimization of consumption for the solar battery when the voltage drops below 2V (deep-sleep), added option to invert event for reed switch, small optimizations. |
| 4.0 | Improved stability in connected mode. I2C bus CLK and PullUp correction. |
| 4.1 | Changed "connection latency" for stability in connected. |
| 4.2 | Option Increasing Communication Distance: Bluetooth 5.0 LE Long Range (Advertising Extensions: primary and secondary Coded PHY S=8, Connectable). Added support MHO-C401 (2022.11) and MJWSD05MMC. Added function key: Connect |
| 4.3 | Increasing the degree of averaging (x64) of the sent values over the battery. Added "Screen Off" option. Check LYWSD03MMC HW: B1.5. Added MHO-C122 (2AWMOMHOC122) test support. LCD display stabilization LYWSD03MMC HW:B1.9 |
| 4.4 | Adding an option to display only external data. Only the value from the "EEP BindKey" is now taken as the BindKey. |
| 4.5 | Replacing BTHome ver1 (HA_BLE) with BTHome ver2. Moving firmware after recovery to BLE from Zigbee OTA. Fixed a bug where the date was not displayed correctly for MJWSD05MMC. |
| 4.6 | All thermometers support EXT OTA. Flashing third party Zigbee OTA files (*.zigbee). |
| 4.7 | Changing sensor settings: Added slope factor, zero offset in 0.01 units. |
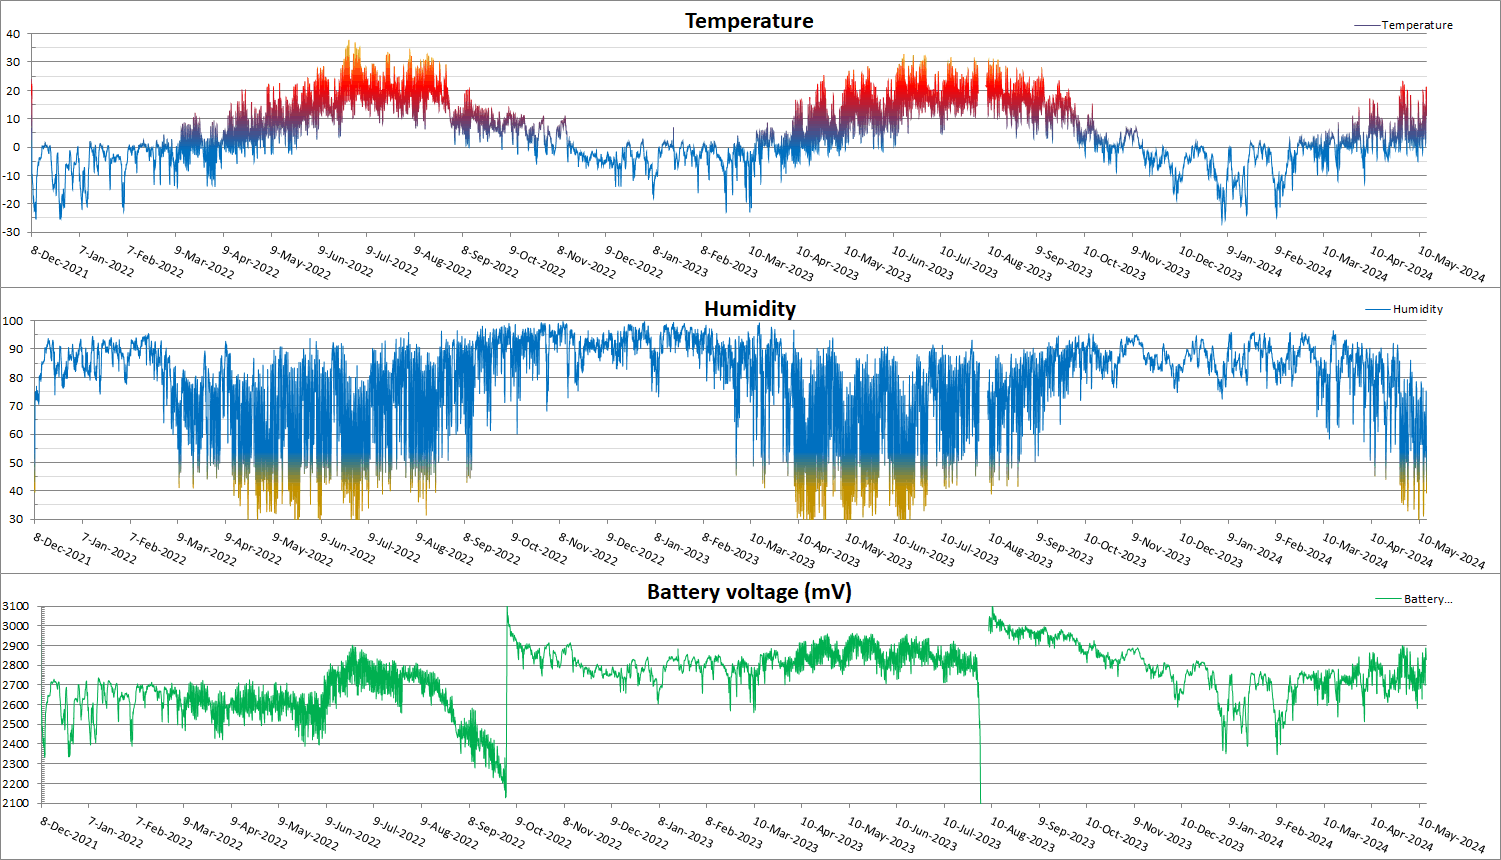
To record the measurement results, a cyclic buffer in the flash memory for 20000 measurements is used. The recording step interval is set in the interface. With the default settings, the recording step is 10 minutes, which gives a recording depth of 4 and a half months. During the step period, the sensor data and battery voltage are averaged, time stamped, and written to flash memory.
Setting the value to 0 disable logging to internal storage.
GraphAtc.html GraphAtc1.html GraphAtc2.html DevPoint.html

This requires the Experimental Web Platform Features flag enabled in your browser. See Flashing or Updating the Firmware (OTA).
Xiaomi Mijia (LYWSD03MMC B1.4)
Using the default settings for advertising interval of 2.5 seconds and measurement interval of 10 seconds:
- Bluetooth Advertisement: 14..15 uA 3.3V (CR2032 over 1 years)
- Bluetooth Connection: 14..25 uA 3.3V (CR2032 over 10 months)


Xiaomi Mijia (MJWSD05MMC)
Using the default settings for advertising interval of 5 seconds and measurement interval of 20 seconds:
- Bluetooth Advertisement: 19..21 uA 3.3V (CR2450 over 2 years)
- Bluetooth Connection: 25..30 uA 3.3V (CR2450 over 1.5 years)
Xiaomi Miaomiaoce (MHO-C401)
Using the default settings for advertising interval of 2.5 seconds and measurement interval of 20 seconds:
- Bluetooth Advertisement: 15..30 uA 3.3V (depends on the amount of temperature or humidity changes over time to display)
- Bluetooth Connection: 15..30 uA 3.3V (depends on the amount of temperature or humidity changes over time to display)
Xiaomi Miaomiaoce (MHO-C401N)
Using the default settings for advertising interval of 2.5 seconds and measurement interval of 20 seconds:
- Bluetooth Advertisement: 10..14 uA 3.3V (depends on the amount of temperature or humidity changes over time to display)
- Bluetooth Connection: 13..17 uA 3.3V (depends on the amount of temperature or humidity changes over time to display)
Qingping (CGDK2)
Using the default settings for advertising interval of 2.5 seconds and measurement interval of 20 seconds:
- Bluetooth Advertisement: 18..21 uA 3.3V
- Bluetooth Connection: 23..30 uA 3.3V
Qingping (CGG1)
Using the default settings for advertising interval of 2.5 seconds and measurement interval of 20 seconds:
- Bluetooth Advertisement: 12..16 uA 3.3V
- Bluetooth Connection: 23..30 uA 3.3V
Qingping (CGG1N)
Using the default settings for advertising interval of 2.5 seconds and measurement interval of 10 seconds:
- Bluetooth Advertisement: 12..16 uA 3.3V
- Bluetooth Connection: 23..30 uA 3.3V
The Firmware can be configured to support one of four different Bluetooth advertisements data formats:
Xiaomi, ATC, Custom, BTHome and encrypted options.
Supports bindkey beacon encryption.
Test program of used Bluetooth Advertising formats provided by Ircama.
Only the BTHome and Xiaomi support the native HA Xiaomi Integration, for the others use the Custom Component Passive BLE.
- (!) Custom Component Passive BLE does not support Bluetooth 5.0 (LE Long Range).
UUID 0x181A - size 16 (temperature in 0.1 °C, humidity in 1 %): atc1441 format
UUID 0x181A - size 19: Custom extended format in 0.01 units (all data little-endian):
uint8_t     size;   // = 18
uint8_t     uid;    // = 0x16, 16-bit UUID
uint16_t    UUID;   // = 0x181A, GATT Service 0x181A Environmental Sensing
uint8_t     MAC[6]; // [0] - lo, .. [6] - hi digits
int16_t     temperature;    // x 0.01 degree
uint16_t    humidity;       // x 0.01 %
uint16_t    battery_mv;     // mV
uint8_t     battery_level;  // 0..100 %
uint8_t     counter;        // measurement count
uint8_t     flags;  // GPIO_TRG pin (marking "reset" on circuit board) flags:
                    // bit0: Reed Switch, input
                    // bit1: GPIO_TRG pin output value (pull Up/Down)
                    // bit2: Output GPIO_TRG pin is controlled according to the set parameters
                    // bit3: Temperature trigger event
// bit4: Humidity trigger event- UUID 0xFE95 - 0x0A: Xiaomi - battery charge level 0..100%, battery voltage in mV
- UUID 0xFE95 - 0x0D: Xiaomi - temperature x0.1C, humidity x0.1%
- UUID 0xFE95 - 0x0A, 0x04, 0x06 Xiaomi - battery charge level 0..100%, temperature x0.1C, humidity x0.1% (All data are averaged over a period of 16 measurements)
- Primary Service - Environmental Sensing Service (0x181A):
- Characteristic UUID 0x2A1F - Notify temperature x0.1C
- Characteristic UUID 0x2A6E - Notify temperature x0.01C
- Characteristic UUID 0x2A6F - Notify about humidity x0.01%
- Primary Service - Battery Service (0x180F):
- Characteristic UUID 0x2A19 - Notify the battery charge level 0..99%
- Primary Service (0x1F10):
- Characteristic UUID 0x1F1F - Notify, frame id 0x33 (configuring or making a request): temperature x0.01C, humidity x0.01%, battery charge level 0..100%, battery voltage in mV, GPIO-pin flags and triggers.
Xiaomi LYWSD03MMC has a PCB soldering test point. Available without disassembling the case and marked "Reset". Use as a trigger output with adjustable temperature and / or humidity hysteresis. Hysteresis and thresholds are set in TelinkMiFlasher.html. The output status is displayed in the advertising package.


Hysteresis:
- =0 off,
- if less than zero - activation on decrease,
- if more than zero - activation on excess
Setting the pin to "1" or "0" works if both hysteresis are set to zero (TRG off).

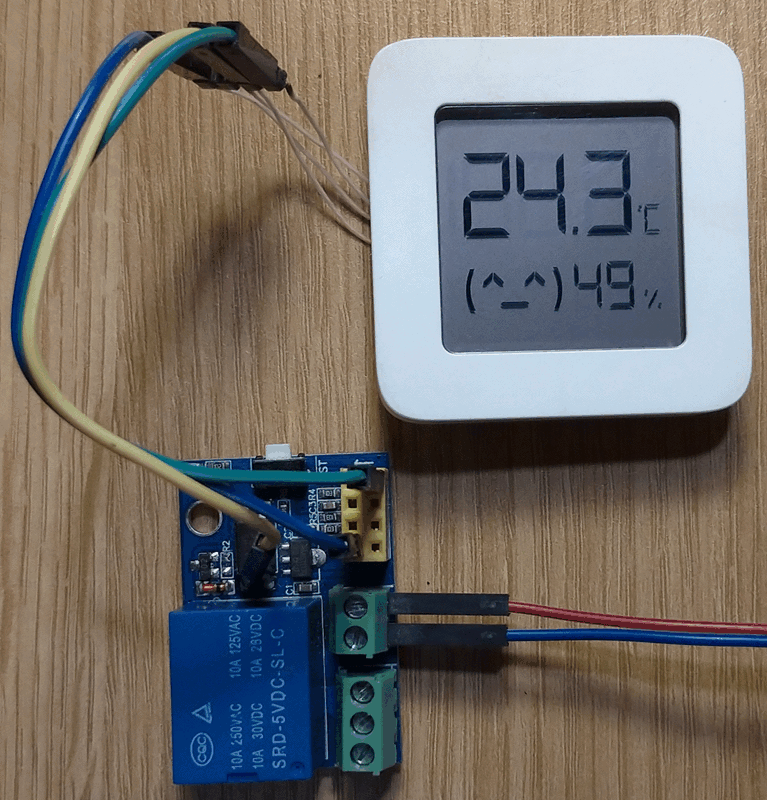
Trigger and reed switch status receiver on JDY-10 module ($1).
For CGG1, MHO_C401, CGDK2, MJWSD05MMC, a button on the case is used.
It is possible to solder a reed switch on the LYWSD03MMC board to the pins marked "P8" (GPIO PA6) and GND.
The button on the body can turn the light on and off when creating a scenario in an external program...
The state of the reed switch or button is transferred to the advertising packet and events are sent in the "Switch" and "Ccounter" modes.
Setting the "Connect" option has several functions:
- Short press for 80 seconds turns on the ability to connect with a device in BLE 4.2 format
- Long press toggles temperature display to C or F.
- Holding more than 20 seconds will reset the device settings to default.
- LCD shows:
- Big number: -99.5..1999.5
- Small number: -9..99
- Smiley, battery, degrees
- Setting the display time limit in sec

USBCOMFlashTx.html - Uses a partial imitation of the Telink 1-Wire protocol on a USB-UART adapter, but only for transmission to the chip.
For programming and debugging, the chip uses a special hardware protocol Telink 1-Wire (not even close to UART!).
To match the frequencies of the Telink 1-Wite bus, no change in Baud-rate is required.
While the chip is sleeping and when the SWS pin is reassigned, there is no access to programming.
You can restore communication via “Telink 1-Wire” by rebooting the chip and sending a command to stop the CPU. This is called "Activation".
The USBCOMFlashTx.html program does not have feedback - it does not receive data from the chip. This is a simplified version and only works if all connections are made correctly.


In difficult cases, when the chip contains an unknown FW, it is necessary to use a chip reset or power supply during "activation".

At the same time, take into account that the chip can be powered from the TX output. This is solved by connecting TX and +Vbat during "activation".
Alternative programmers:
- TLSR825xComFlasher.py - partial simulation of
Telink 1-Wireon a USB-UART adapter. - TlsrComProg - uses a bootloader with the transition to working via the UART protocol.
- TLSRPGM - full hardware option Telink 1-Wire up to 2 mbit/s
- TLSR8251F512ET24 (TLSR8258 in 24-pin TQFN). SoC: TC32 32-bit MCU 48Mhz, 64 KiB SRAM, 512 KiB Flash (GD25LE40C), Bluetooth 5.0: Mesh, 6LoWPAN, Zigbee, RF4CE, HomeKit, Long Range, Operating temperature: -40°C to +85°C, Power supply: 1.8V to 3.6V.
- SHTV3 sensor. Measurement range: Temperature -40°C to +125°C, Humidity 0 to 100 %RH. Power supply: 1.8V to 3.6V
- IST3055NA0 LCD controller
LYWSD03MMC B1.4 B1.5 BoardPinout

For LYWSD03MMC, the HW version is determined by the display and sensor addresses on I2C:
| HW | LCD I2C addr | SHTxxx I2C addr | Note |
|---|---|---|---|
| B1.4 | 0x3C | 0x70 (SHTC3) | |
| B1.5 | UART | 0x70 (SHTC3) | |
| B1.6 | UART | 0x44 (SHT4x) | |
| B1.7 | 0x3C | 0x44 (SHT4x) | Test original string HW |
| B1.9 | 0x3E | 0x44 (SHT4x) | |
| B2.0 | 0x3C | 0x44 (SHT4x) | Test original string HW |
Version 1.7 or 2.0 is determined at first run by reading the HW line written in Flash. Display matrices or controllers are different for all versions, except B1.7 = B2.0.
Windows:
- Go to wiki.telink-semi.cn and get the IDE for TLSR8 Chips.
- Install the IDE and import the 'ATC_MiThermometer' project
- Compile the project
Ubuntu:
  git clone https://github.com/pvvx/ATC_MiThermometer.git
  cd ATC_MiThermometer
  make
ATC_MiThermometer is based on the original work of @atc1441, who developed the initial custom firmware version and the web-based OTA flasher (Source).
-
Alternative programmer TLSR SWire on module TB-04/03F or E104-BT10
-
Additional information on the format Advertising for Xiaomi LYWSD03MMC
| ID | Command |
|---|---|
| 0x01 | Get/Set device name |
| 0x02 | Get address of internal devices |
| 0x03 | I2C scan |
| 0x04 | I2C Universal TRansaction (UTR) |
| 0x10 | Get/Set MAC |
| 0x11 | Get/Set Mi key: DevNameID |
| 0x12 | Get/Set Mi keys: Token & Bind |
| 0x15 | Get all Mi keys |
| 0x16 | Restore prev mi token & bindkeys |
| 0x17 | Delete all Mi keys |
| 0x18 | Get/set binkey in EEP |
| 0x20 | Get/Set comfort parameters |
| 0x22 | Get/Set show LCD ext.data |
| 0x23 | Get/Set Time |
| 0x24 | Get/set adjust time clock delta |
| 0x33 | Start/Stop notify measures in connection mode |
| 0x35 | Read memory measures |
| 0x36 | Clear memory measures |
| 0x44 | Get/Set TRG config |
| 0x45 | Set TRG output pin |
| 0x4A | Get/Set TRG data (not save to Flash) |
| 0x55 | Get/Set device config |
| 0x56 | Set default device config |
| 0x5A | Get/Set device config (not save to Flash) |
| 0x60 | Get/Set LCD buffer |
| 0x61 | Start/Stop notify LCD buffer |
| 0x70 | Set PinCode |
| 0x71 | Request Mtu Size Exchange |
| 0x72 | Set Reboot on disconnect |
| 0x73 | Extension BigOTA (MJWSD05MMC) |
| 0xDD | Reset LE Long Range mode |